How to Know When to Replace Brakes on Your Car
November 16, 2025
Brake problems are one of the top causes of car accidents, yet many drivers miss the early warning signs. Taking charge of your vehicle’s brake maintenance can make a major difference in safety and peace of mind. Learning how to check your brake pads, test performance, and spot trouble early puts you back in control and can help you avoid costly repairs or accidents. This step-by-step guide reveals exactly how to safely determine when it’s time to replace your brakes.
Table of Contents
- Step 1: Gather Basic Tools and Safety Gear
- Step 2: Inspect Brake Pad Thickness and Condition
- Step 3: Check for Warning Signs While Driving
- Step 4: Test Brake Responsiveness and Noise
- Step 5: Confirm Replacement Timing Based on Findings
Quick Summary
| Key Point | Explanation |
|---|---|
| 1. Gather essential safety gear | Safety glasses, gloves, and a fire extinguisher are crucial for safe brake replacement. |
| 2. Inspect brake pad condition | Check thickness and signs of wear; pads must be above 1/32 inch for safety. |
| 3. Heed warning signs while driving | Symptoms like unusual noises or soft pedals indicate brake issues requiring attention. |
| 4. Test brake functionality thoroughly | Conduct a test drive to evaluate responsiveness and listen for noises that indicate problems. |
| 5. Confirm replacement timing based on condition | Replace pads when wear indicators show damage; don’t delay maintenance to avoid safety risks. |
Step 1: Gather Basic Tools and Safety Gear
Before diving into brake replacement, youll need to prepare your workspace with the right tools and safety gear. According to DriveSafe Online, proper safety equipment is crucial when performing vehicle maintenance tasks.
Your safety gear and tool kit should include essential items like safety glasses to protect your eyes from debris, mechanic gloves to shield your hands from sharp edges and chemicals, and a fire extinguisher as a precautionary measure. As recommended by the California Bureau of Automotive Repair, these safety items are non negotiable when working on your vehicles brake system.
Additional tools youll want to gather include a jack and jack stands for lifting your vehicle safely, a lug wrench to remove wheel nuts, a set of brake pad spreaders or a c clamp, and a torque wrench for precise tightening of components. Keeping your workspace clean and organized will make the brake replacement process smoother and help you stay focused on the task at hand.
Pro tip: Always work in a well ventilated area and have a clean workspace before starting any vehicle maintenance project. This helps prevent accidents and ensures you can concentrate on the intricate work of brake replacement.
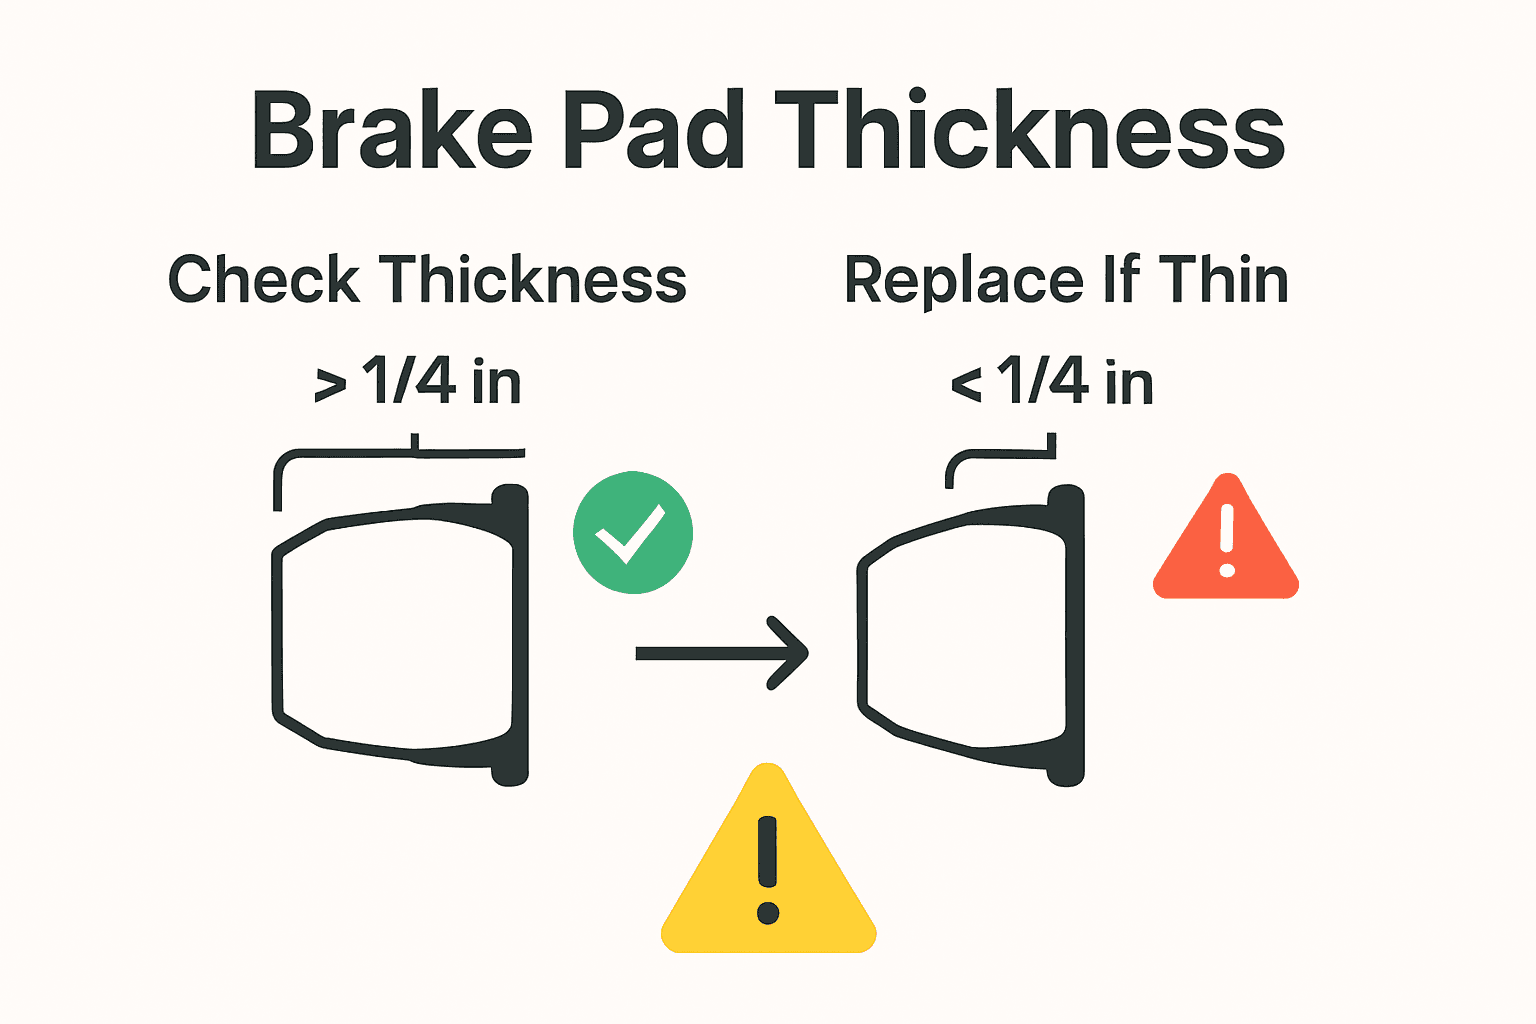
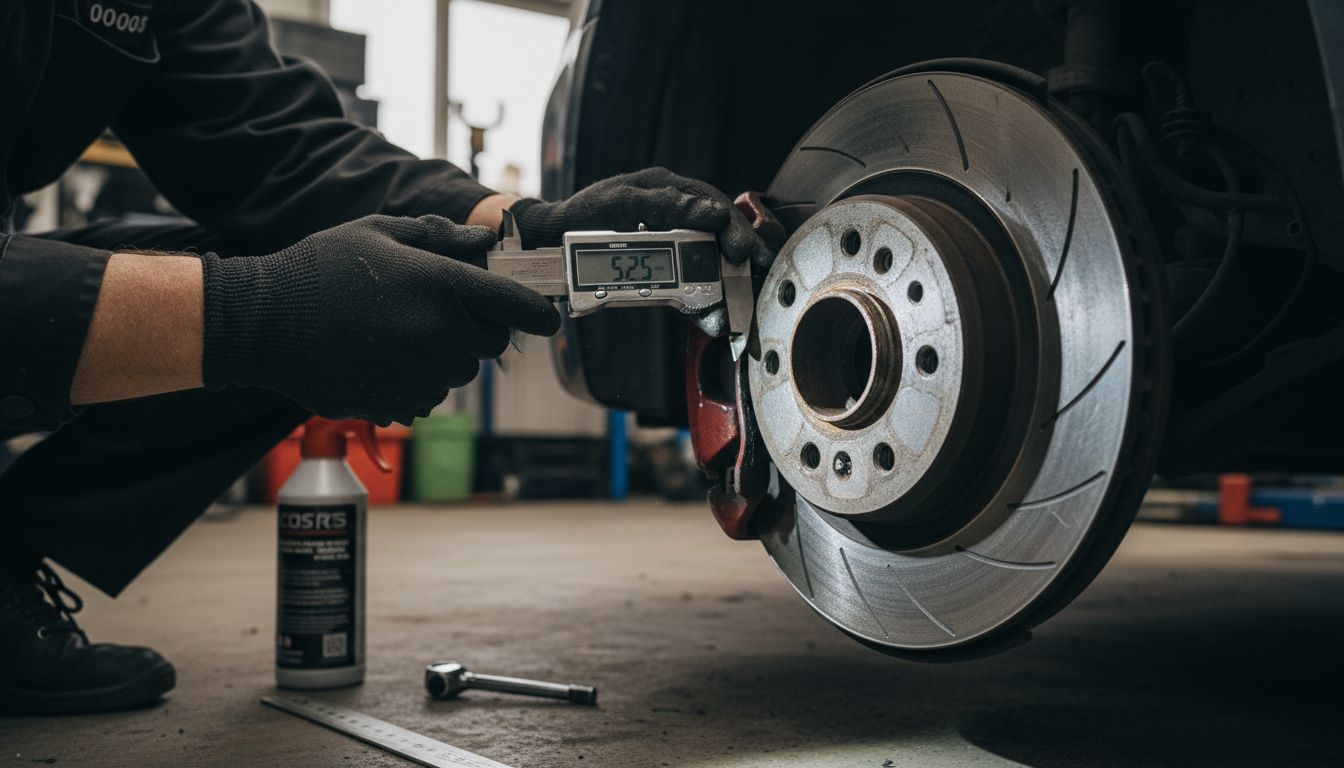
Step 2: Inspect Brake Pad Thickness and Condition
Now that youre geared up and ready to go, its time to assess the condition of your brake pads. According to the South Carolina Department of Education’s Brake Manual, a thorough visual inspection is crucial to determine whether your brake pads need replacement.
To check your brake pad thickness, youll first need to visually inspect the pad through the wheel spokes or by removing the wheel. The California Bureau of Automotive Repair specifies that brake pad linings must be greater than or equal to 1/32 inch thick for bonded linings or 1/64 inch above rivet heads for riveted linings. Look for signs of uneven wear, deep grooves, or metallic fragments which can indicate more serious brake system problems.
If you dont feel comfortable measuring the pad thickness yourself or lack the proper tools, consider having a professional mechanic perform the inspection.
 Some vehicles have wear indicators that create a squealing sound when the pads are too thin as an additional warning sign. Remember that brake pad condition directly impacts your vehicles stopping ability and overall safety on the road.
Pro tip: When in doubt about your brake pad condition, its always better to err on the side of caution and have them professionally inspected. Your safety depends on properly functioning brake components.
Step 3: Check for Warning Signs While Driving
As you continue your brake replacement journey, its crucial to understand the warning signs that indicate your brake system needs attention. Car Care Council advises motorists to stay alert for specific symptoms that could signal potential brake issues.
According to the California Bureau of Automotive Repair, watch for key warning signs while driving such as brake grabbing, low pedal feel, and unusual squealing noises. Other red flags include the vehicle pulling to one side during braking, experiencing unexpected vibrations in the brake pedal, or hearing grinding sounds when you apply the brakes. An illuminated brake warning light on your dashboard is another critical indicator that something might be wrong with your brake system.
Your vehicles brake performance directly impacts your safety on the road. If you notice any of these warning signs persistently, dont ignore them. When in doubt about the severity of the brake issues, its always recommended to have a professional mechanic perform a comprehensive brake system inspection. You might want to check out our guide on questions to ask a mechanic to help you navigate this process effectively.
Pro tip: Trust your instincts. If something feels off with your brakes, its better to have them checked immediately rather than risk potential safety issues down the road.
Step 4: Test Brake Responsiveness and Noise
With your safety gear ready and initial brake pad inspection complete, its time to evaluate your vehicles brake performance through a careful test drive. The Car Care Council recommends conducting a thorough assessment of brake responsiveness and listening carefully for any unusual sounds.
According to the California Bureau of Automotive Repair, a comprehensive brake test involves checking the pedal feel and monitoring for specific warning noises. Start by finding an empty stretch of road where you can safely perform your test. Apply the brakes at different speeds and pay attention to how the pedal feels press smoothly or feels soft and mushy. Listen for high pitched squealing grinding or scraping sounds which could indicate worn brake pads or more serious mechanical issues.
During your test drive note how the vehicle responds when braking. Does it pull to one side? Do you feel any vibrations through the brake pedal? Are your stops smooth and consistent? These observations can provide critical insights into your brake systems overall health. If you notice any significant irregularities or feel uncertain about your findings its best to have a professional mechanic perform a detailed inspection.
Pro tip: When testing brake responsiveness start at lower speeds and gradually increase to ensure you can safely control the vehicle. Trust your instincts if something feels off even if you cant pinpoint exactly what the problem might be.
Step 5: Confirm Replacement Timing Based on Findings
After conducting your comprehensive brake inspection, its time to make a critical decision about brake replacement. The Car Care Council emphasizes that brake wear is not a one size fits all scenario and depends on multiple factors including your driving habits and vehicle type.
According to the California Bureau of Automotive Repair, brake pad replacement becomes necessary when the linings no longer meet minimum thickness requirements. Compare your test drive observations with standard wear indicators. If you experienced soft brake pedal feel significant noise during braking uneven stopping or visible pad wear less than 1/4 inch thick its definitely time to replace your brake pads. Consider your typical driving conditions city driving with frequent stops will wear brakes faster than highway driving.
Dont postpone brake maintenance if youre experiencing any warning signs. While replacing brakes might seem like an expensive undertaking the cost of potential brake failure far outweighs the price of proactive replacement. If youre unsure about your specific situation or lack the mechanical confidence to replace brakes yourself consulting a professional mechanic can provide definitive guidance tailored to your vehicles specific needs.
Pro tip: Document the symptoms and measurements from your inspection. This information can help a mechanic quickly diagnose any potential issues and provide more accurate recommendations for your specific vehicle.
Know When It’s Time to Trust Your Brakes and Your Next Car Purchase
Brakes are vital for your safety on the road but understanding when to replace them can be tricky. Whether it’s the soft pedal feel or that nagging squealing noise these warning signs demand attention to keep you safe. If you’re looking for a vehicle that meets your needs without the guesswork of hidden histories ReVroom offers a fresh perspective on buying rebuilt title cars with full transparency.

Explore thousands of vehicles where every listing comes with detailed accident history and pre-repair photos helping you avoid surprises and find the best deals. Go beyond worrying about brake wear and step confidently into your next adventure with a smarter way to buy cars at ReVroom. Start your safer, fairer car search today and go further with every mile.
Frequently Asked Questions
How can I tell if my brake pads need replacement?
You can determine if your brake pads need replacement by inspecting their thickness and condition. Look for signs of wear, such as thickness less than 1/4 inch or any metal fragments, and consider replacing them immediately if they are below this threshold.
What warning signs should I look for while driving that indicate brake issues?
Pay attention to symptoms like a low pedal feel, unusual squeaking, or your vehicle pulling to one side when braking. If you notice these signs, take action by scheduling a brake inspection as soon as possible to ensure your safety.
How do I check my brake pad thickness myself?
You can check your brake pad thickness by visually inspecting them through the wheel spokes or removing the wheel altogether. Measure the lining to see if it is greater than or equal to 1/32 inch thick; if it’s less, plan to replace the pads soon.
How do I test my brakes for responsiveness and noise?
To test your brakes, find an empty road and apply the brakes at different speeds, noting how the pedal feels and listening for any unusual sounds. If you detect grinding or vibrations, prioritize inspecting your brakes before driving further.
When is the best time to replace my brakes after an inspection?
If during your inspection or test drive you notice a soft pedal feel or significant noise, it’s time for a replacement. Aim to replace your brake pads within 30 days to avoid compromising your safety.
Should I replace my brakes if I hear a warning sound?
Yes, if you hear a warning sound like squealing or grinding, consider it a sign indicating that your brake pads may be too thin. Schedule a professional inspection immediately to assess the situation and prevent brake failure.
