


Car Cleaning Guide for Budget-Conscious Buyers
August 3, 2026
TL;DR:
- A basic car cleaning kit costs about 150 to 200 dollars and provides dozens of washes with proper technique.
- Using automotive-specific products like pH-balanced soap and ammonia-free glass cleaner helps protect paint and screens.
You can make a rebuilt or branded title car look sharp and last for years with a starter kit in the $150–$200 range and a simple routine you run every few weeks. Grab two buckets, a pH-balanced car soap, a microfiber wash mitt, a drying towel, and an ammonia-free glass cleaner. That’s your foundation. Resources like Consumer Reports, Kelley Blue Book (KBB), and Revroom all point to the same truth: the right products and technique matter far more than spending big.
Your immediate action plan:
- Wash the exterior this week using the two-bucket method
- Vacuum and wipe down the interior
- Apply a coat of wax or paint sealant after the first wash
- Schedule a wash every 2–4 weeks going forward
- Pull a Revroom History Report to know exactly what your car’s been through before you prioritize any cosmetic work
Table of Contents
- What car cleaning tools should you actually buy?
- How to wash the exterior without creating swirl marks
- How to clean the interior without damaging surfaces
- Which paint protection option fits your budget?
- What does a realistic cleaning schedule actually cost?
- The most common mistakes that cost you money
- When is it worth hiring a professional detailer?
- Revroom makes the starting point easier
- Key Takeaways
- The Revroom take on cleaning and long-term value
- Useful sources for further reading
- FAQ
What car cleaning tools should you actually buy?
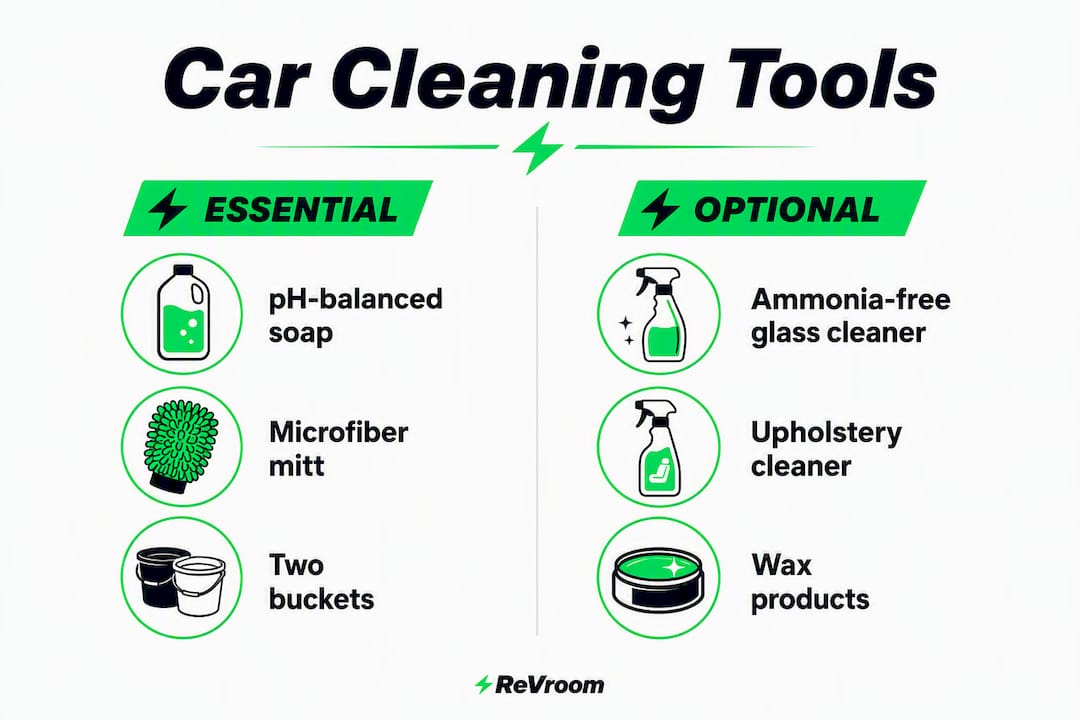
AARP’s guide puts a solid starter kit at around $200, and that investment covers dozens of washes. Most items cost roughly $10 each, and the kit pays for itself quickly compared to repeated commercial wash visits.
| Tool/Product | Purpose | Budget Estimate |
|---|---|---|
| pH-balanced car soap | Lifts dirt without stripping wax or seals | $10–$15 |
| Two wash buckets | Two-bucket method to prevent swirl marks | $10 each |
| Microfiber wash mitt | Soft contact wash, reduces scratching | $10 each |
| Microfiber drying towels | Streak-free drying, absorbs fast | $10 each |
| Ammonia-free glass cleaner | Safe for screens and tinted windows | $10 each |
| Wheel brush | Removes brake dust without scratching | $10 each |
| Wheel cleaner (dedicated) | Dissolves road grime on rims | $10–$15 |
Consumer Reports recommends ammonia-free glass cleaner and pH-balanced soap specifically because modern finishes are more sensitive than older ones. KBB backs this up: household cleaners like dish soap strip wax and dry out rubber seals, and ammonia-based glass cleaners can permanently damage infotainment screens.
Pro Tip: Before using any new product, test it on a small, hidden area first. This single habit, flagged by experts at AAutomotives, prevents accidental damage to coatings and trim that can cost far more to fix than the product itself.
Avoid these household products on your car:
- Dish soap (strips wax and degrades rubber seals)
- Ammonia-based glass cleaners (damages screens and tinted windows)
- Bleach or heavy degreasers (discolors plastic and dries leather)
- Rough scrub pads or steel wool (scratches clear coat permanently)
How to wash the exterior without creating swirl marks
Follow this sequence every wash. Order matters.
- Rinse the whole car top to bottom with a hose or pressure washer to remove loose grit before any contact.
- Clean wheels first. Brake dust and road grime from wheels will splash onto paint if you save them for last. Use a dedicated wheel brush and wheel cleaner.
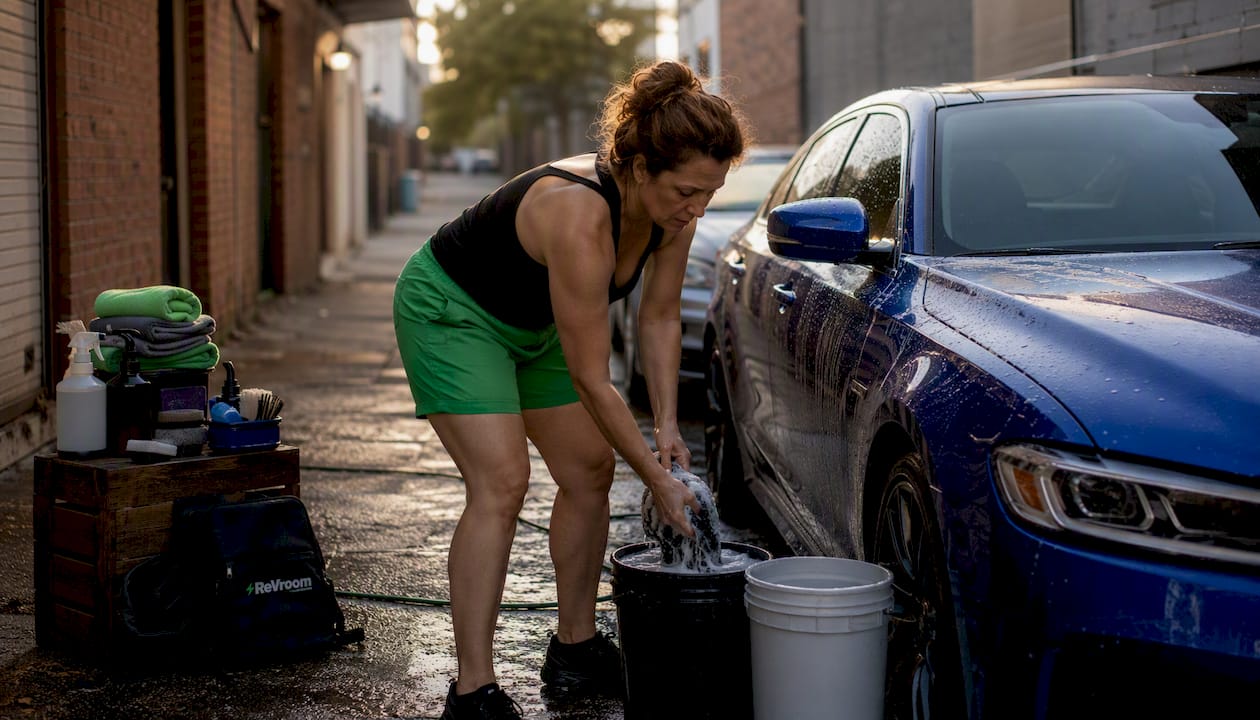
- Set up two buckets: one with pH-balanced soap, one with clean rinse water only.
- Wash in straight-line motions from top to bottom, rinsing your mitt in the rinse bucket after every panel. Circular scrubbing traps grit and creates swirl marks.
- Rinse the car again top to bottom before the soap dries.
- Dry immediately with a clean microfiber drying towel using straight-line strokes, not circles. Water spots form fast in direct sun.
The two-bucket method is the single most effective technique for protecting paint. Grit dragged back across the surface is the primary cause of swirl marks, and a dedicated rinse bucket stops that from happening.
Pro Tip: Jessica Tran, owner of Studio 94, recommends investing in the right basics and letting technique do the work. Straight-line motions and a clean mitt beat expensive chemicals every time.
How to clean the interior without damaging surfaces
Start by removing everything from the car, including floor mats. Then vacuum from top to bottom so debris falls onto areas you haven’t cleaned yet.
Fabric seats and carpets:
- Vacuum thoroughly before applying any liquid
- Blot stains, never rub; rubbing pushes stains deeper into fibers
- Use an enzyme-based upholstery cleaner for organic stains (food, pet, coffee)
- Work in small sections and blot dry immediately to avoid over-wetting
Leather and vinyl:
- Use a dedicated automotive leather cleaner, not household soap
- Follow with a leather conditioner to prevent cracking
- Avoid glossy dashboard dressings; they create glare that reflects into your windshield
Screens and glass:
- Use only ammonia-free glass cleaner on infotainment screens; ammonia destroys anti-fingerprint coatings
- Wipe one direction on the inside, the opposite direction on the outside so streaks are easy to identify
- Always test first on a corner of the screen before wiping the full surface
A small in-car kit (a few microfiber cloths, a travel-size upholstery cleaner, and baking soda for odors) handles most spills before they set. For rebuilt or branded title vehicles, a Revroom History Report tells you what the car went through, so you know whether to prioritize interior or exterior work first.
Which paint protection option fits your budget?
| Protection Type | Durability | DIY Cost | Best For |
|---|---|---|---|
| Carnauba wax | 1–3 months | $15–$30 | Budget buyers, frequent reapplication fine |
| Synthetic paint sealant | 6–12 months | $15–$30 | Daily drivers wanting longer intervals |
| Ceramic coating | 2–5 years | — | Long-term investment, high-use vehicles |
Wax is enough for most budget buyers, especially if you’re washing every 2–4 weeks. Popular Mechanics recommends waxing every 3–6 months as a baseline. A synthetic sealant stretches that interval and holds up better against UV and rain.
Before applying any protection, the paint surface needs to be clean and decontaminated. If the paint feels rough after washing, a clay bar removes bonded contaminants that soap can’t lift. Never apply wax or sealant over dirty paint; you’ll lock the grime in.
- Clay bar treatment before first protection application
- Reapply wax every 1–3 months or sealant every 6–12 months
- Check water beading: when water stops beading, protection has worn off
What does a realistic cleaning schedule actually cost?
EagleStar Detail recommends washing every 2–4 weeks and professional detailing 2–4 times per year for daily drivers, with more frequent attention in coastal or salted-road regions.
| Service | Frequency | Estimated Cost |
|---|---|---|
| DIY wash (consumables) | Every 2–4 weeks | $2–$5 per wash |
| DIY light detail | Every 3 months | $10 each in product |
| Professional basic detail | 1–2 times/year | $150–$200 |
| Professional full detail | 1–2 times/year | — |
| Starter kit (one-time) | Once | ~$150–$200 |
For undercarriage care, a touchless high-pressure rinse every 1–2 weeks during winter or in coastal areas is one of the highest-impact, lowest-cost habits you can build. Salt and road chemicals cause corrosion that no amount of waxing fixes after the fact.
Decision checklist:
- Drive daily in a harsh climate? Wash every 2 weeks, detail 3–4 times per year.
- Garage-kept or low-mileage? Wash monthly, detail 1–2 times per year.
- Family vehicle with kids? Add interior spot-cleaning after every trip.
- Tight budget? DIY everything except paint correction and odor remediation.
The most common mistakes that cost you money
Most car-cleaning mistakes come down to using the wrong product or the wrong motion. Here’s what to avoid:
- Dish soap on paint: strips wax and dries rubber seals with every wash
- Ammonia glass cleaner on screens: permanently damages anti-fingerprint and anti-glare coatings
- Circular washing motions: drag grit across paint and create swirl marks
- One towel for everything: spreads brake dust from wheels onto paint surfaces
- Skipping the rinse bucket: reintroduces grit to the paint on every panel
Consumer Reports technician Michael Crossen makes the same point from a product angle: modern vehicle finishes need gentler handling than household surfaces. pH-balanced soap and ammonia-free glass cleaner aren’t upsells; they’re the baseline for not causing damage.
Pro Tip: Keep separate labeled microfiber towels for wheels, paint, glass, and interior. Color-coding them takes 30 seconds and prevents the most common source of scratches.
When is it worth hiring a professional detailer?
DIY handles most routine work well. But some jobs genuinely need a pro.
Hire a pro for:
- Paint correction (swirl removal, oxidation): requires a machine polisher and trained hands; DIY attempts often cause more damage
- Embedded contamination that clay bar and washing can’t remove
- Odor remediation after water exposure or smoke; ozone treatment and enzyme cleaning require professional equipment
- Rust treatment beyond surface-level; surface rust on a rebuilt or branded title vehicle needs proper treatment before it spreads to structural areas
- Ceramic coating application if you want a multi-year result; prep and application errors are hard to reverse
When DIY is the smarter call:
- Routine washes and interior vacuuming
- Wax or sealant application after a clean surface prep
- Glass cleaning and trim wipe-downs
- Seasonal undercarriage rinsing
Revroom’s vehicle history listings and Revroom History Reports give you a clear picture of what a specific car went through before you spend money on cosmetic work. Knowing the vehicle’s history lets you prioritize: a car with minor cosmetic history might need nothing beyond a good wash, while one with more involved repairs might benefit from a professional interior deep-clean first.
Revroom makes the starting point easier
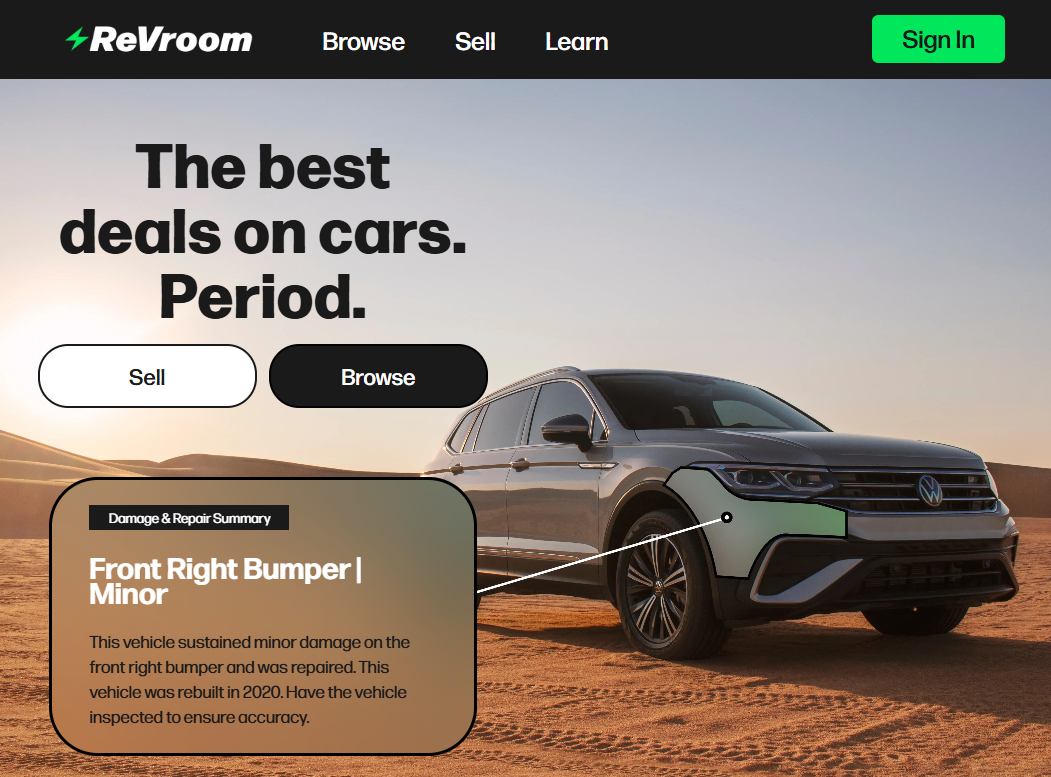
Spending $300 on detailing a car you bought blind is a gamble. Revroom removes that uncertainty. Every vehicle listed on Revroom is state-certified, repaired, and road ready, and each listing includes vehicle history and photos of what the car looked like before repairs. You know what you’re getting before you spend a dollar on cleaning supplies.
Rebuilt and branded title vehicles are typically up to 50% cheaper than clean title equivalents. A $15 Revroom History Report gives you the full picture on any rebuilt or branded title vehicle you’re considering anywhere, including what happened, how severe it was, and whether the asking price is fair. That’s less than a car wash, and it tells you exactly where to focus your cleaning budget. Browse listings or grab a report at revroom.org.
Key Takeaways
A moderately priced starter kit, the two-bucket wash method, and a regular wash schedule give a rebuilt or branded title vehicle a durable, presentable finish without overspending.
| Point | Details |
|---|---|
| Build the right kit first | A ~$150–$200 one-time starter kit covers dozens of washes and outperforms repeated commercial visits. |
| Two-bucket method prevents damage | Use one bucket for soap, one for rinsing the mitt; straight-line motions stop grit from scratching paint. |
| Skip household cleaners | Dish soap, ammonia, and bleach strip coatings and damage screens; always use automotive-specific products. |
| Match your schedule to your use | Daily drivers need a wash every 2–4 weeks and professional detailing 2–4 times per year. |
| Revroom History Reports prioritize your spend | A $15 report tells you a vehicle’s full history so you clean and invest where it actually matters. |
The Revroom take on cleaning and long-term value
Here’s something most detailing guides skip: cleaning a car you understand is completely different from cleaning one you bought blind. When you know a vehicle’s history, you know where to look, what to protect, and what’s already been addressed. That changes how you approach every wash, every wax coat, and every decision about whether to call a pro.
Budget buyers sometimes feel like they have to compensate for a rebuilt or branded title with extra spending on cosmetics. That’s backwards. A state-certified, road-ready vehicle with transparent history doesn’t need you to guess. It needs the same good habits any car does: regular washing, the right products, and a little attention to the undercarriage in winter. The car maintenance basics are the same regardless of title status.
Revroom exists because every car deserves a fair shot, and every buyer deserves to know what they’re getting. Clean it well, protect it consistently, and let the vehicle history do the heavy lifting on confidence.
Useful sources for further reading
- Consumer Reports: How to Keep Your Car Really Clean
- Kelley Blue Book: DIY Cleaning Hacks and Household Cleaner Warnings
- AARP Smart Guide to Cleaning Your Car
- Popular Mechanics: Car Cleaning Essentials
- EagleStar Detail: How Often to Detail Your Car
- Revroom: How to Detail Your Car for a Professional Finish
- Revroom: How to Prevent Car Rust Naturally
- Revroom: Smart Car Cleaning Hacks for Budget Buyers
- Revroom History Reports
FAQ
What’s the cheapest way to clean a car properly?
A starter kit of two buckets, a pH-balanced soap, a microfiber wash mitt, and drying towels costs about $150 to $200 and covers dozens of washes. Technique matters more than product cost.
Can dish soap damage my car’s paint?
Yes. Dish soap strips protective wax and dries out rubber seals with repeated use; always use a pH-balanced automotive soap instead.
How often should I wash a rebuilt or branded title vehicle?
Every 2–4 weeks for daily drivers, with a professional detail 2–4 times per year, is the standard recommendation. Coastal or winter climates call for more frequent undercarriage rinsing.
What does a Revroom History Report tell me?
A $15 Revroom History Report covers what happened to a specific rebuilt or branded title vehicle, how severe it was, and whether the asking price is fair compared to similar clean-title vehicles in your area.
Is ammonia-free glass cleaner really necessary?
Yes. Ammonia-based cleaners permanently damage anti-fingerprint and anti-glare coatings on modern infotainment screens and can degrade window tint over time.
